Live diff and update quarkus deployments in OpenShift using Jetbrains IDEA

Prerequisites
-
OpenShift CLI, oc: installation instructions
-
Kubernetes by Red Hat, Kubernetes Plugin for JetBrains IDEA Marketplace
-
Quarkus CLI, Quarkus: Installation Instructions
-
Optional: Source code for this blog post: https://github.com/adietish/openshift-quickstart
IntelliJ Kubernetes Plugin
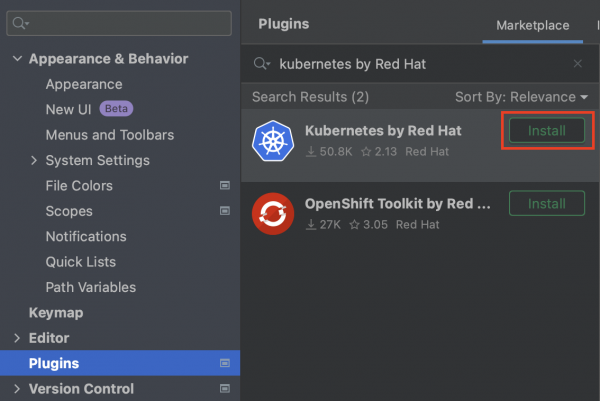
This shows you how the Kubernetes Plugin for Jetbrains IDEA is a great companion when deploying quarkus apps to OpenShift. To install the plugin in Jetbrains IDEA, navigate to the Settings, go to the Plugins section, and search for "Kubernetes by Red Hat" to initiate the installation process.
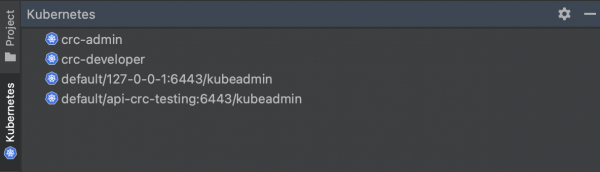
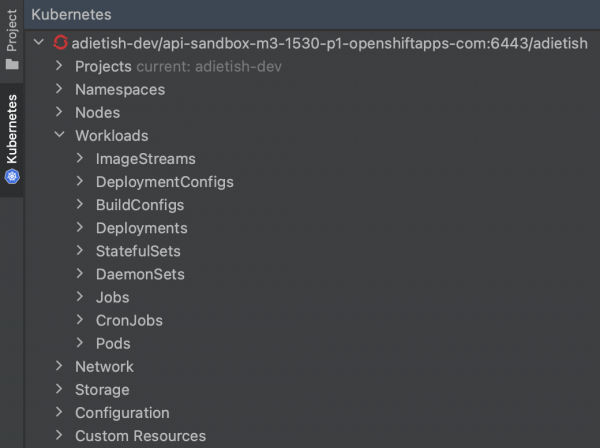
By utilizing the plugin, you will have an extra tool window positioned on the left side of your IDEA interface. This window displays the Kubernetes clusters specified in your Kubernetes configuration located at ~/.kube/config. If you haven’t defined any clusters yet, the list will be empty.
Prepare your Quarkus application for OpenShift
With the Kubernetes plugin for IDEA successfully installed, we can now proceed to prepare our source code for deployment to OpenShift. You have the option to either retrieve the source from GitHub, utilize your existing source code, or create a new Quarkus application from scratch.
-
Assuming that you have your own source, we need to prepare it for deployment on OpenShift. Quarkus offers extensions that do most of the job for you. We need the OpenShift extension and the jib extension. You can enable them using the Quarkus command line or add them manually to your pom file.
<dependency>
    <groupId>io.quarkus</groupId>
    <artifactId>quarkus-openshift</artifactId>
</dependency>
<dependency>
    <groupId>io.quarkus</groupId>
    <artifactId>quarkus-container-image-jib</artifactId>
</dependency>-
If you want to generate a Quarkus app from scratch you can use the quarkus command line utility to configure those for you.
quarkus create app org.acme:openshift-quickstart \
--extension='resteasy-reactive,openshift,quarkus-container-image-jib'-
Now that you have your source ready, you can open it in Jetbrains IDEA and get on with the steps towards deployment.
Publish the Image to Docker Hub
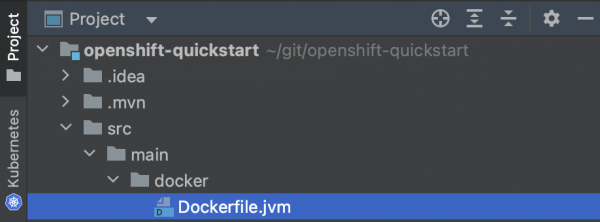
The project generated by the Quarkus command line tool includes a Dockerfile located at src/main/docker/Dockerfile.jvm. If you decide to use your own source code, you can easily copy the Dockerfile from the provided GitHub repository containing the sample source code.
The Dockerfile is utilized to generate a Docker image, which is used by OpenShift (or Kubernetes) to run your application. In order for OpenShift to access and utilize the image, it needs to be stored in a Docker registry.
While most OpenShift or Kubernetes installations provide their own Docker registry, the Red Hat developer sandbox does not. Consequently, we will employ Docker Hub for this purpose. To accomplish this, we will configure the build process to push the image to Docker Hub. Although these settings can be specified via the command line, for the sake of simplicity, we will utilize the src/main/resources/application.properties file.
| Hint: |
|---|
We are pushing the docker image to Docker Hub. We thus need to provide our account ID with quarkus.container-image.group |
quarkus.container-image.build=true
quarkus.openshift.jvm-dockerfile=src/main/Dockerfile.jvm
quarkus.container-image.builder=jib
quarkus.container-image.push=true
quarkus.container-image.group=<your Docker Hub account> # use your Docker Hub account
quarkus.container-image.name=openshift-quickstart
quarkus.openshift.route.expose=true
First we instruct the maven build to build the Docker image.
quarkus.container-image.build=true
Then we point the build to our Docker file.
quarkus.openshift.jvm-dockerfile=src/main/Dockerfile.jvm
Furthermore we tell the maven to use the jib extension to create the Docker image.
quarkus.container-image.builder=jib
We also instruct the build to push the Docker image to a registry. Use your Docker Hub account for this setting.
quarkus.container-image.push=true
We hand it our account on Docker hub.
quarkus.container-image.group=<your Docker Hub account> # use your Docker Hub account
We configure the name of the resulting Docker image for easy identification.
quarkus.container-image.name=openshift-quickstart
Finally we instruct the build to create a Route so that our application is accessible from the internet.
quarkus.openshift.route.expose=true
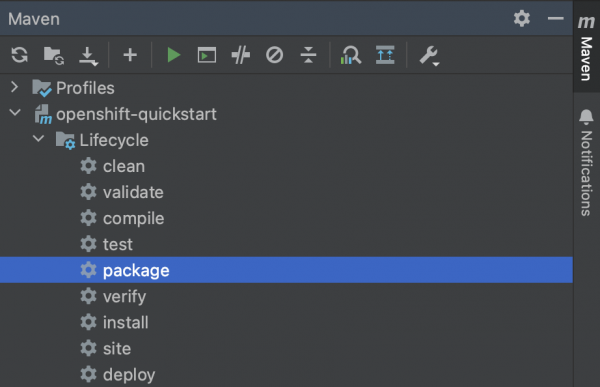
With the build configuration successfully set up, we are now prepared to execute the build process. Simply running the Maven package command is all that’s required to package the application into a JAR file, create a Docker image with the JAR, and push the image to Docker Hub. To initiate the build, locate the Maven toolbox on the right edge of your IDEA and double-click on the package command.
Alternatively you can launch maven on the command line:
./mvnw clean package
During the build process, you will observe the execution of all the aforementioned steps in the output.
[INFO] [io.quarkus.container.image.jib.deployment.JibProcessor] LogEvent [level=INFO, message=trying docker-credential-desktop for registry.hub.docker.com]
[INFO] [io.quarkus.container.image.jib.deployment.JibProcessor] Using base image with digest: sha256:f921cf1f9147e4b306908f3bcb61dd215b4a51970f8db560ede02ee6a492fa99
[INFO] [io.quarkus.container.image.jib.deployment.JibProcessor] LogEvent [level=LIFECYCLE, message=Using credentials from Docker config (/Users/andredietisheim/.docker/config.json) for adietish/openshift-quickstart:1.0.0-SNAPSHOT]
[INFO] [io.quarkus.container.image.jib.deployment.JibProcessor] Container entrypoint set to [java, -Djava.util.logging.manager=org.jboss.logmanager.LogManager, -jar, quarkus-run.jar]
[INFO] [io.quarkus.container.image.jib.deployment.JibProcessor] Pushed container image adietish/openshift-quickstart:1.0.0-SNAPSHOT (sha256:bfba9dd104b363e828a61bde800cd2299fae8b65fc9a5ffcd4c322061b3a8c0e)
Get your free Red Hat Developer Sandbox
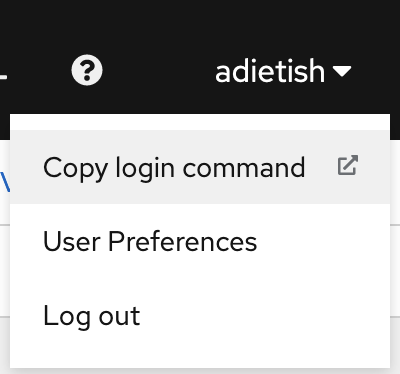
Next, let’s focus on the cluster to which we intend to deploy. Red Hat provides a free OpenShift cluster for individuals interested in exploring its capabilities. To obtain your own cluster, simply visit https://developers.redhat.com/developer-sandbox and request an instance. Once you complete a quick and straightforward registration process, you can start the cluster and access its web console. In the console, your username will be visible in the upper right corner of the header. Clicking on it will display a menu with an option labeled "Copy login command." By selecting this option, you will configure the Red Hat Developer Sandbox as your current cluster and store a locally accessible token for authentication purposes.

Now copy, paste and run this command in your terminal shell.
oc login --token=sha256~XXXXXXXXXXXXXXXX --server=https://api.sandbox-m3.1530.p1.openshiftapps.com:6443| Hint: |
|---|
If you already have a Red Hat Developer Sandbox, chances are that your token is expired. You would notice this when listing the projects isn’t possible. |
IntelliJ Kubernetes is your friend
In IntelliJ, you can navigate to the Kubernetes tool window, where you will find the Red Hat Developer Sandbox set as the active cluster. By expanding the cluster, you can explore various resource categories that reveal the existing resources within your cluster. For example, you can view your current project or namespace. It’s important to note that any action performed through the plugin will be executed within the context of this project and the changes get visible immediately. There’s no need for a manual refresh.
Create the Cluster Resources
Upon executing the Maven build, a file is generated in the target/kubernetes directory. This file encompasses the OpenShift resources necessary for deploying your application. This is done by the Quarkus Kubernetes Extension. The Intelij plugin works with this file so you can use it both for automation but also via your IDE.
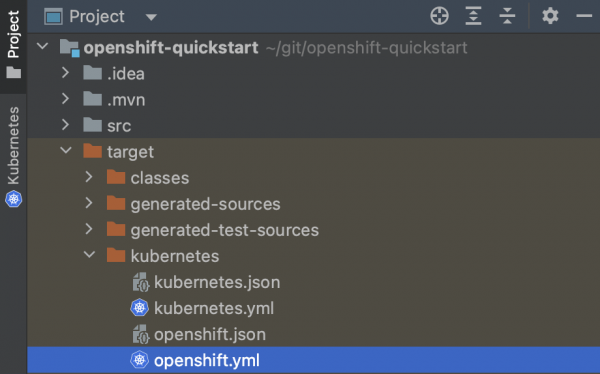
If you open this file, you can have a glimpse on how your application is deployed. The file consists of the following OpenShift resources:
-
DeploymentConfig
-
ImageStream
-
Service
-
Route
The DeploymentConfig will be responsible for creating a Pod, which serves as an environment for running containers that host your application. These containers will utilize the Docker image you have built and published on Docker Hub.
kind: DeploymentConfig
...
  image: openshift-quickstart:1.0.0-SNAPSHOT
To make the Docker image available to the cluster, an ImageStream is utilized. This ImageStream is configured to reference your image stored on Docker Hub.
kind: ImageStream
...
  dockerImageRepository: docker.io/adietish/openshift-quickstart
To expose your application within the cluster, a Service is employed. This Service is responsible for mapping the container ports to ports that are accessible internally within the cluster.
kind: Service
...
- name: https
  port: 443
  protocol: TCP
  targetPort: 8443
Finally, a Route is utilized to expose the Service to the internet, making your application accessible from external sources.
kind: Route
...
port:
  targetPort: http
to:
  kind: Service
  name: openshift-quickstart
To deploy your application, simply create these resources on the cluster. The editor will prompt you to push the file to the cluster and generate the necessary resources. Alternatively, you can use the push icon that’s the first icon to the left in the toolbar.

The resource tree in the Kubernetes toolkit window is highly dynamic, continuously reflecting the presence and absence of cluster resources. When you push the resource file, the corresponding resources are created on the cluster and instantly appear in the resource tree. The specific resources we are currently interacting with can be found under the Workloads and Network categories in the resource tree.
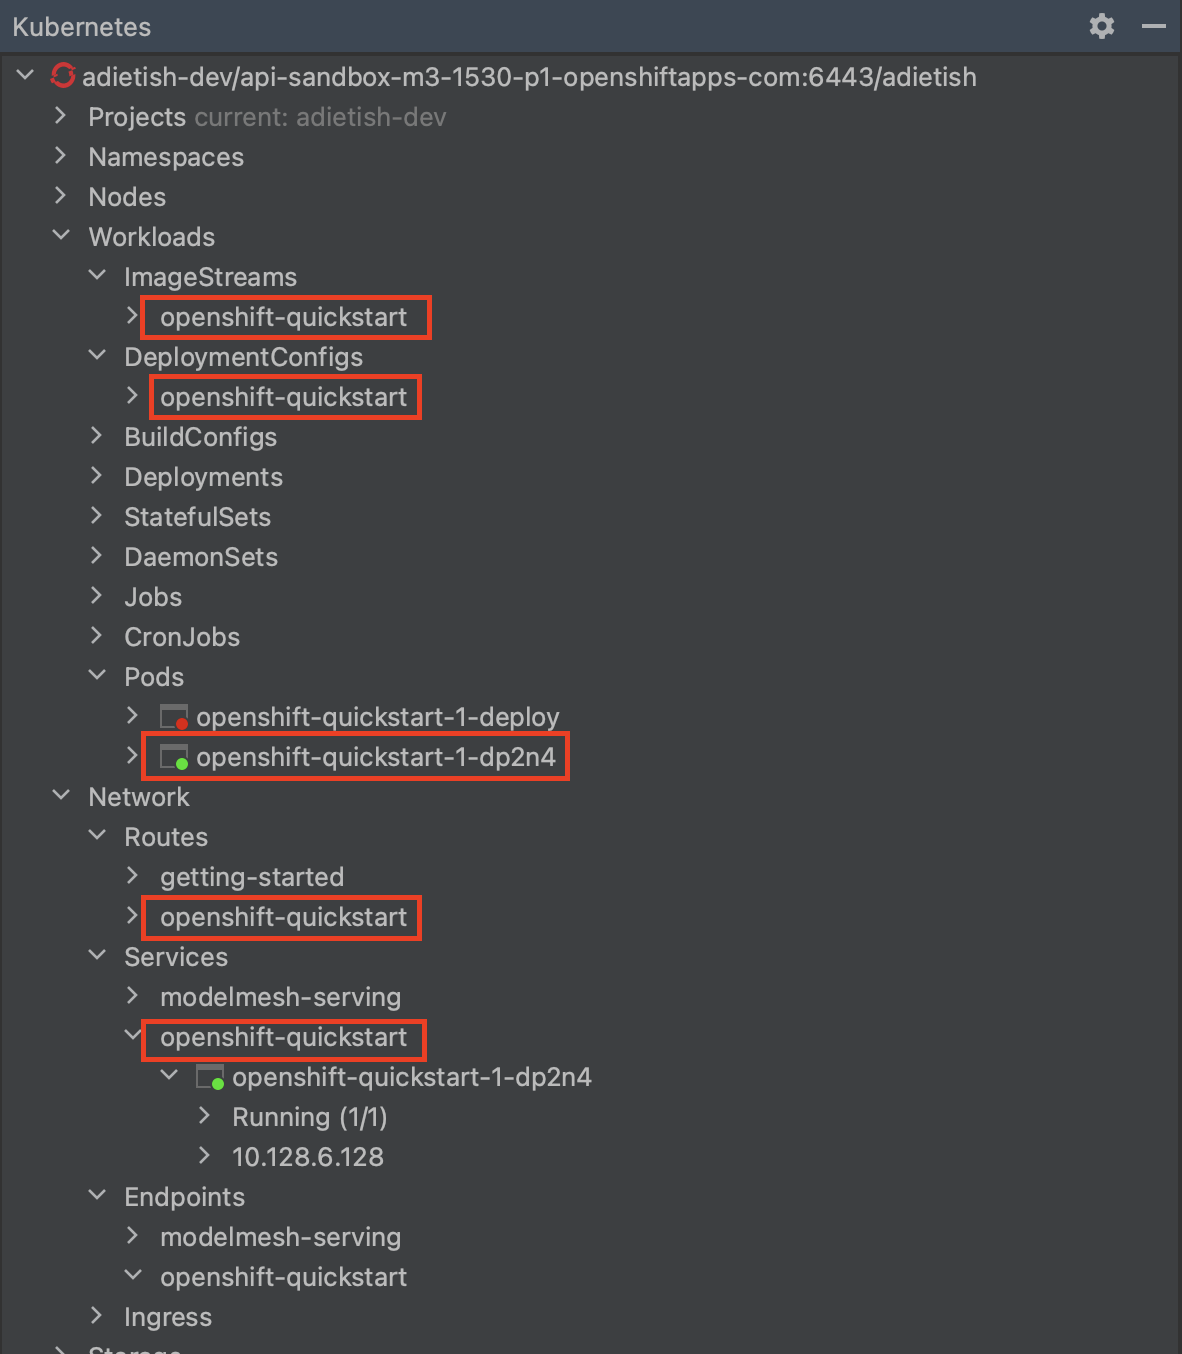
Pods in the resource tree are represented by icons displaying either a red or green dot. A green dot signifies that the pod is currently running, while a red dot indicates that the pod is either in the process of being initialized or terminated. By expanding a pod in the tree, additional information is revealed, including its internal cluster IP and the status of its container(s). In the provided screenshot, the pod consists of a single container that is currently running.
Browse the Application
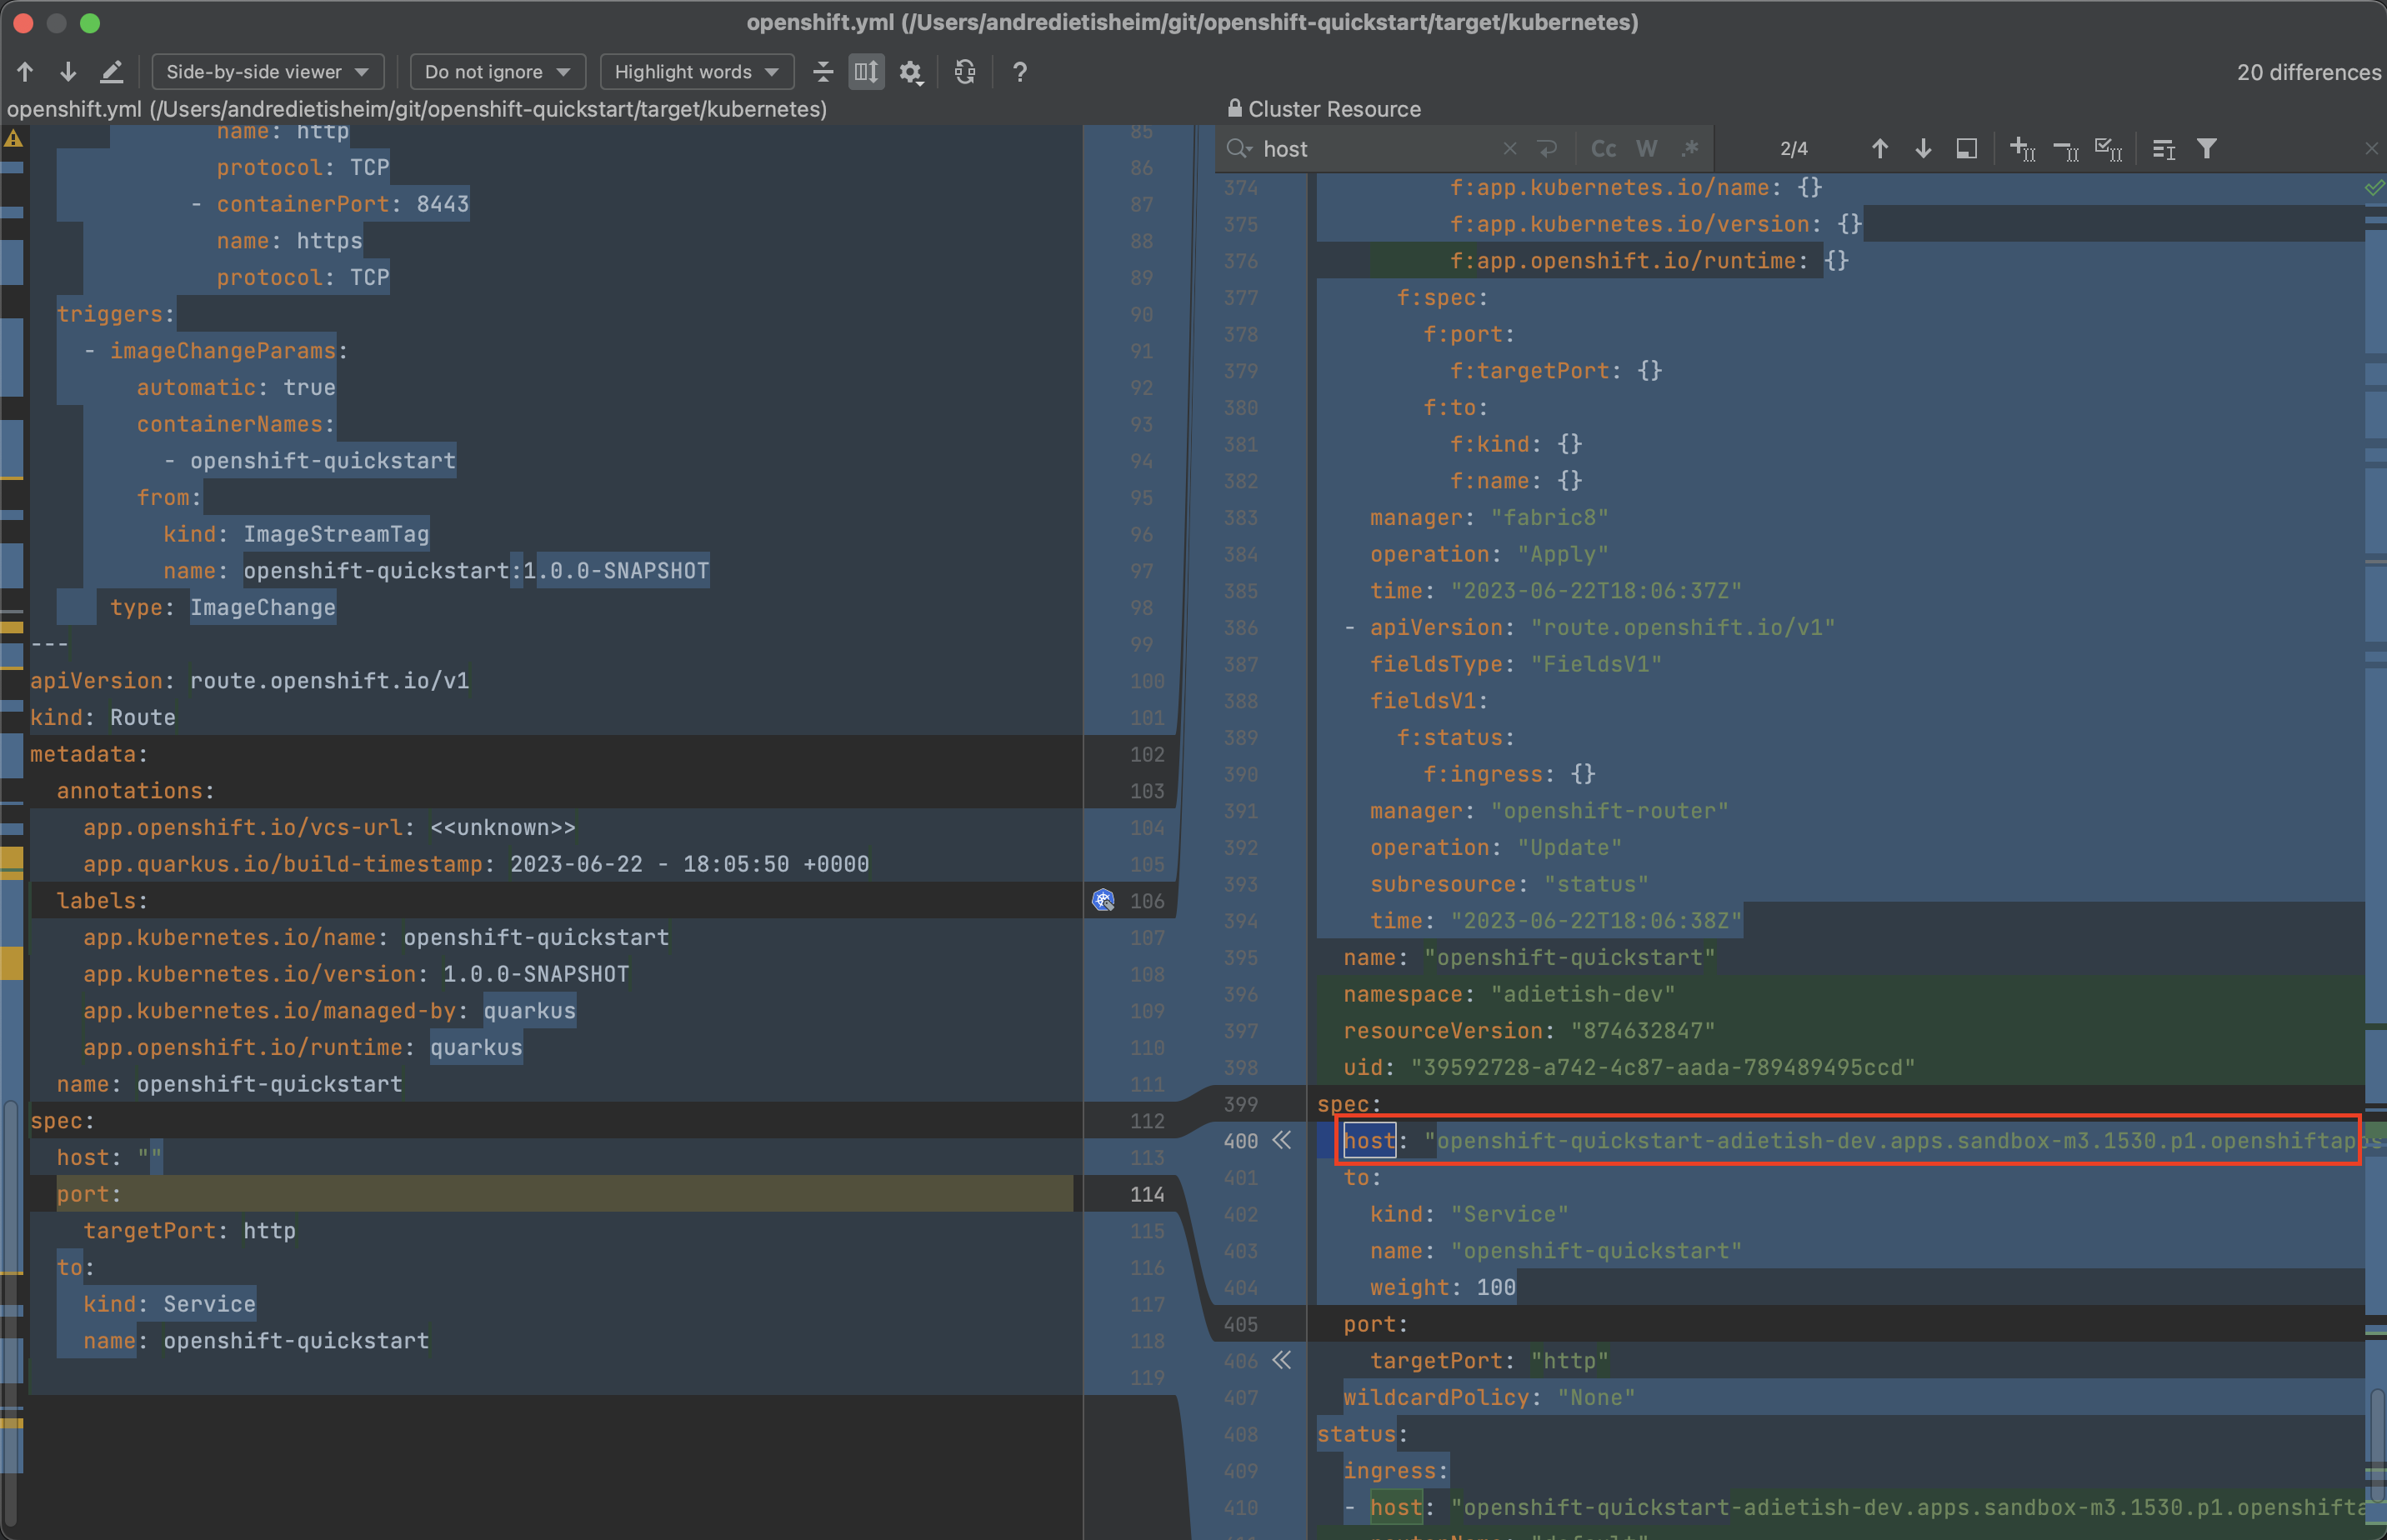
In order to access the application through a browser, we require its URL. In our configuration, we let OpenShift generate the host name for us. This was accomplished by configuring the Route to have an empty or nonexistent host value.
kind: Route
...
  host: ""
Hence, it is necessary for us to determine the hostname generated by the cluster. To achieve this, we can utilize the available Diff feature in the editor, which displays the disparities between the resources specified in our file and the resources that currently exist on the cluster.

Clicking on the Diff action in the toolbar will open a split dialog. The left section of the dialog displays the local file, while the right section displays the resources that currently exist on the cluster. At this point, you can search for the host value and copy it once you locate it.
You can now paste it into a browser see the Quarkus framework page that our application displays when queried. The page shows you that the app consists of a REST service at /hello.
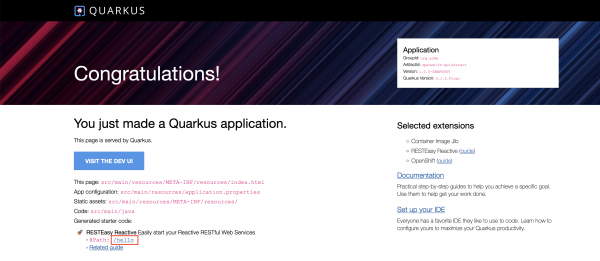
Click the hello-link and you can then see the response of this service.

Quarkus, please log everything
The Quarkus framework logs any event that’s at least INFO. To change this, we can configure the property quarkus.log.level in application.properties. Alternatively one can set it by an environment variable. This is especially useful when you deploy to an OpenShift or Kubernetes cluster. In OpenShift the DeploymentConfig allows you to set the environment for its pods. In your openshift.yml file you will find an environment variable already. It sets the environment variable KUBERNETES_NAMESPACE to the name of your namespace. We can add our property and configure the quarkus logging level. Go to DeploymentConfig > template > spec > containers > env and add the following:
- name: QUARKUS_LOG_LEVEL
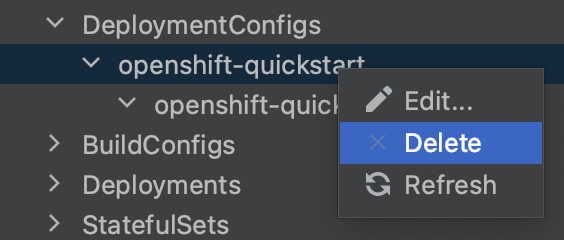
value: ALLThe editor continuously monitors your modifications and reminds you to push them once a resource has been changed. While you could typically proceed with pushing the changes to the cluster, we recommend deleting the existing DeploymentConfig first and then pushing the updated version. This is particularly important when modifying environment variables, as a "running" DeploymentConfig would not be affected by the changes, leading to pods without the updated environment variables. Therefore, use the "Delete" option available in the context menu of your DeploymentConfig.
The plugin then notifies you that the DeploymentConfig was successfully deleted.

The editor then prompts you to push and recreate it.

Deleting the existing DeploymentConfig terminated the existing pods. They disappeared from the resource tree. When you recreated it new Pods were created. These also reappeared as you were spawned. The tree is fully dynamic and reflects changes to the resources as they occur.
Follow Logs
Now that we told quarkus to log all we’d like to verify that our change is effective. We can pick Follow Log in the context menu of the new pod.

This shows the Log console in the lower part of your IDE. It prints the log entries as they are coming in.
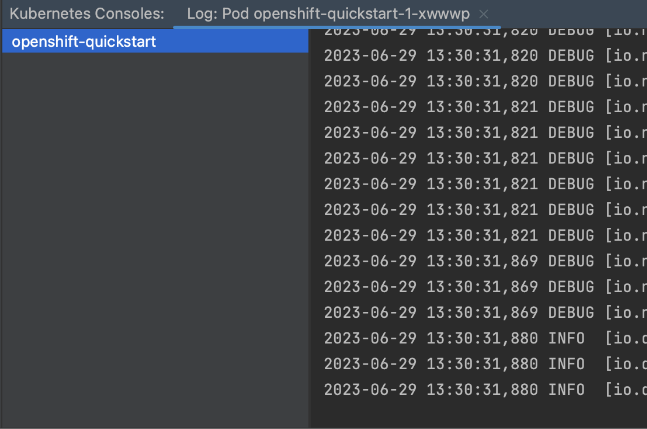
You can see that the quarkus application is logging all events from FATAL to TRACE. A quarkus app by default only logs INFO and upwards. The environment variable that we added caused finer logging to happen.
The log console is split in half. The right side shows the log while the left side shows the containers. Our pod only holds a single container and we therefore only see a single entry. A pod that consists of several containers would have these listed, init containers included. You could then have terminals to either one of these and switch between them by clicking on the listed containers.
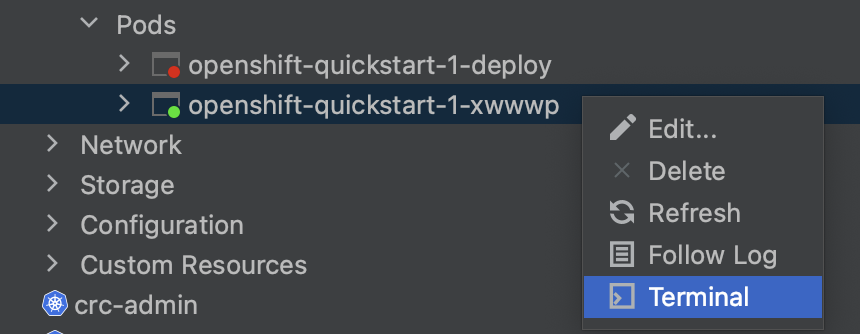
Terminal
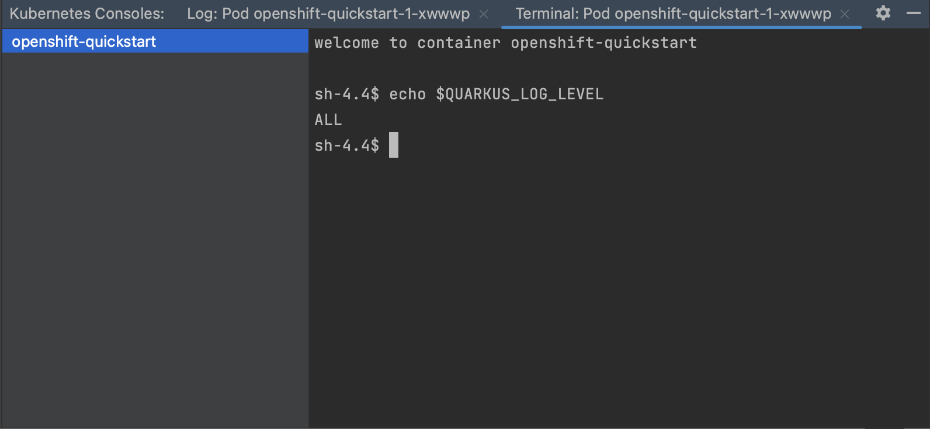
We can of course also verify in the terminal that the environment is set as defined in the DeploymentConfig. We can pick Terminal in the context menu of our pod for this sake.
At the command prompt we can then echo our environment variable and see the value that we configured in our resource file.
Conclusion
In this article, we have demonstrated the deployment process of a Quarkus application to an OpenShift cluster, specifically the free tier Red Hat Developer Sandbox. We have highlighted the usefulness of our Kubernetes Plugin for Jetbrains IDEA in facilitating this task.
+ With the editor, you can effortlessly create and update the necessary resources for application deployment. The dynamic resource tree provides real-time visibility of these resources as they are created. By utilizing the diff feature in the editor, you can observe how the cluster manipulates your resources during creation, allowing you to identify important details such as the generated hostname. Lastly, we have showcased additional features of the plugin, including the ability to monitor application logs and access a terminal shell within the running container.
If you enjoyed this blog post and tried our plugin, please let us know about bugs and missing features at our GitHub page. We’d love to hear from you ❤️